Creating a Contact
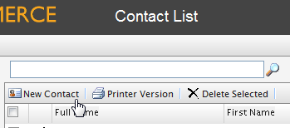
To create a new Contact, from the Contact List page, click on New Contact.
The Contact Edit page appears where you can enter all relevant information about the contact. The only required fields to complete are Full Name, First Name, Last Name, and Email. The rest of the fields are optional but are recommended.
- Select a Parent Organization from the drop-down menu to associate the Contact with a single Parent Organization.
- Assign the Contact to a Customer Group. More Customer Groups can be added by editing the Customer Group Dictionaries. Customer Groups become useful when setting specific permissions and targeted Marketing Campaigns. (For more information, see "How to Assign a Customer Group Sales Price for a Particular Item" section below.)
- Select a Preferred Currency for the contact. If the Contact is in France, you may want to associate the Euro currency. Available currency options are based on settings in Administration > System Settings > Dictionaries > Currencies.
- Select a Preferred Language to associate with the Contact. Languages are populated based on the languages set under Administration > System Settings > Dictionaries > Languages.
- Preferred Shipping and Billing addresses are related to company accounts, refer to Manage Company Accounts for more information.
- The Registration Source field is a text field for entering in notes about the Contact. For instance, you may want to reference which website the Contact is currently registered under.
The Registration Source field is automatically filled when a creates a new Account from the public website.

Click OK to save the Contact. The Contact Info View Form, where you can enter in additional information about the Contact as well as go back and edit the Contact again.
The screenshot below shows the default layout of the Contact Info form. This can be customized using Business Foundation.

To go back to the Contact List, click Cancel or the Contacts button next to the Right Arrow icon.
Version: EPiServer Commerce 1 R2 SP2| Last updated: 2012-09-20 | Copyright © EPiServer AB | Send feedback to us